
02. Installation with Caddy Reverse Proxy on OPNSense
Installation: Official Documentation
Alrigthie then! You want to install Netbird in your homelab such that you can safely access all your applications from the outside world ;) Now, there are two methods either install it with a reverse proxy included or behind an existing reverse proxy such as the Caddy reverse proxy (OPNSense plugin installation is here). Now, they both have their pros and cons, but in this tutorial we will install it behind Caddy on OPNSense. One of the reasons you might like to install Netbrid behind your Caddy reverse proxy is because you can then handle all your networking on your OPNSense box instead of being depended on your server as well.
1. The first thing you want to do is SSH into a Docker VM you want to install Netbird on, which could simply be your DockerVM on which you also deploy all your applications. If you don't deploy your applications with a DockerVM then you could create a dedicated Netbird VM for this. For instance if you are running a "One Click Deployment Workflow" e.g ZimaOS etcetera for your deploying your applications.
2. Once, inside the VM we will create a new folder at a location of your pleasing. If you have installed Arcane as a docker dashboard then we recommend creating the netbird folder in the Arcane projects folder
3. Then cd into the folder and run the Netbird Installation script by copy pasting in their command which will walk you through the installation process. Even though we try to keep pages up to date if the command does not work check their official documentation if it is has changed and then please adjust it here ;)
curl -fsSL https://github.com/netbirdio/netbird/releases/latest/download/getting-started.sh | bash4. The first question will be the domain name you will use to access your Netbird's instance. Make sure you pointed this domain e.g netbird.example.org to your home's IP address. This must be done on the Domain Registrar of the domain!
6. Then the next question will ask you if you want to use an existing reverse proxy or not
Which reverse proxy will you use?
  [0] Traefik (recommended - automatic TLS, included in Docker Compose)
  [1] Existing Traefik (labels for external Traefik instance)
  [2] Nginx (generates config template)
  [3] Nginx Proxy Manager (generates config + instructions)
  [4] External Caddy (generates Caddyfile snippet)
  [5] Other/Manual (displays setup documentation)

Enter choice [0-5] (default: 0):
7. Well in the case of Caddy you will answer this question with 4
8. Then
11. After the installation it will leave you with a caddy-netbird.txt file inside of the netbird folder you are in
caddyfile-netbird.txt
# NetBird Caddyfile Snippet
# Generated by getting-started.sh
#
# Add this block to your existing Caddyfile and reload Caddy

netbird.rfeyn.org {
    # Native gRPC (needs HTTP/2 cleartext to backend)
    @grpc header Content-Type application/grpc*
    reverse_proxy @grpc h2c://127.0.0.1:8080

    # Combined server paths (relay, signal, management, OAuth2)
    @backend path /relay* /ws-proxy/* /api/* /oauth2/*
    reverse_proxy @backend 127.0.0.1:8081

    # Dashboard (everything else)
    reverse_proxy /* 127.0.0.1:8080
}
12. Then we can make some adjustments to this snippet by changing the local IP address 127.0.0.1 to the more explicit IP address of the VM. Simply open up the file with
nano caddyfile-netbird.txt13. Here you can replace the three entries of 127.0.0.1 with your DockerVM IP and also change the port numbers 8080 and 8081 to some different ports if you already use them for something else in your DockerVM. Also if you change the ports here you should also change them in the docker-compose.yml file as well.
OPNSense
Perfect! Now, the installation of Netbird on the DockerVM is done, then now we need to tell our Caddy server on our OPNSense box to forward traffic to it via the caddy.text file that was created in the installation process.
1. First open the NetBird Caddyfile Snippet with
nano
2. This then looks something like this
3. Once inside the OPNSense terminal we will move to the following folder
cd /usr/local/etc/caddy/caddy.d4. Inside of this folder we will create our Caddy snippet with
nano netbird.conf5. Then simply copy paste in the contents of the caddyfile-netbird.txt
6. Then go back into OPNSense and restart your caddy server
7. Then if all is good you should be able to reach your Netbird instance on netbrid.example.org and prompt you with the setup screen as such
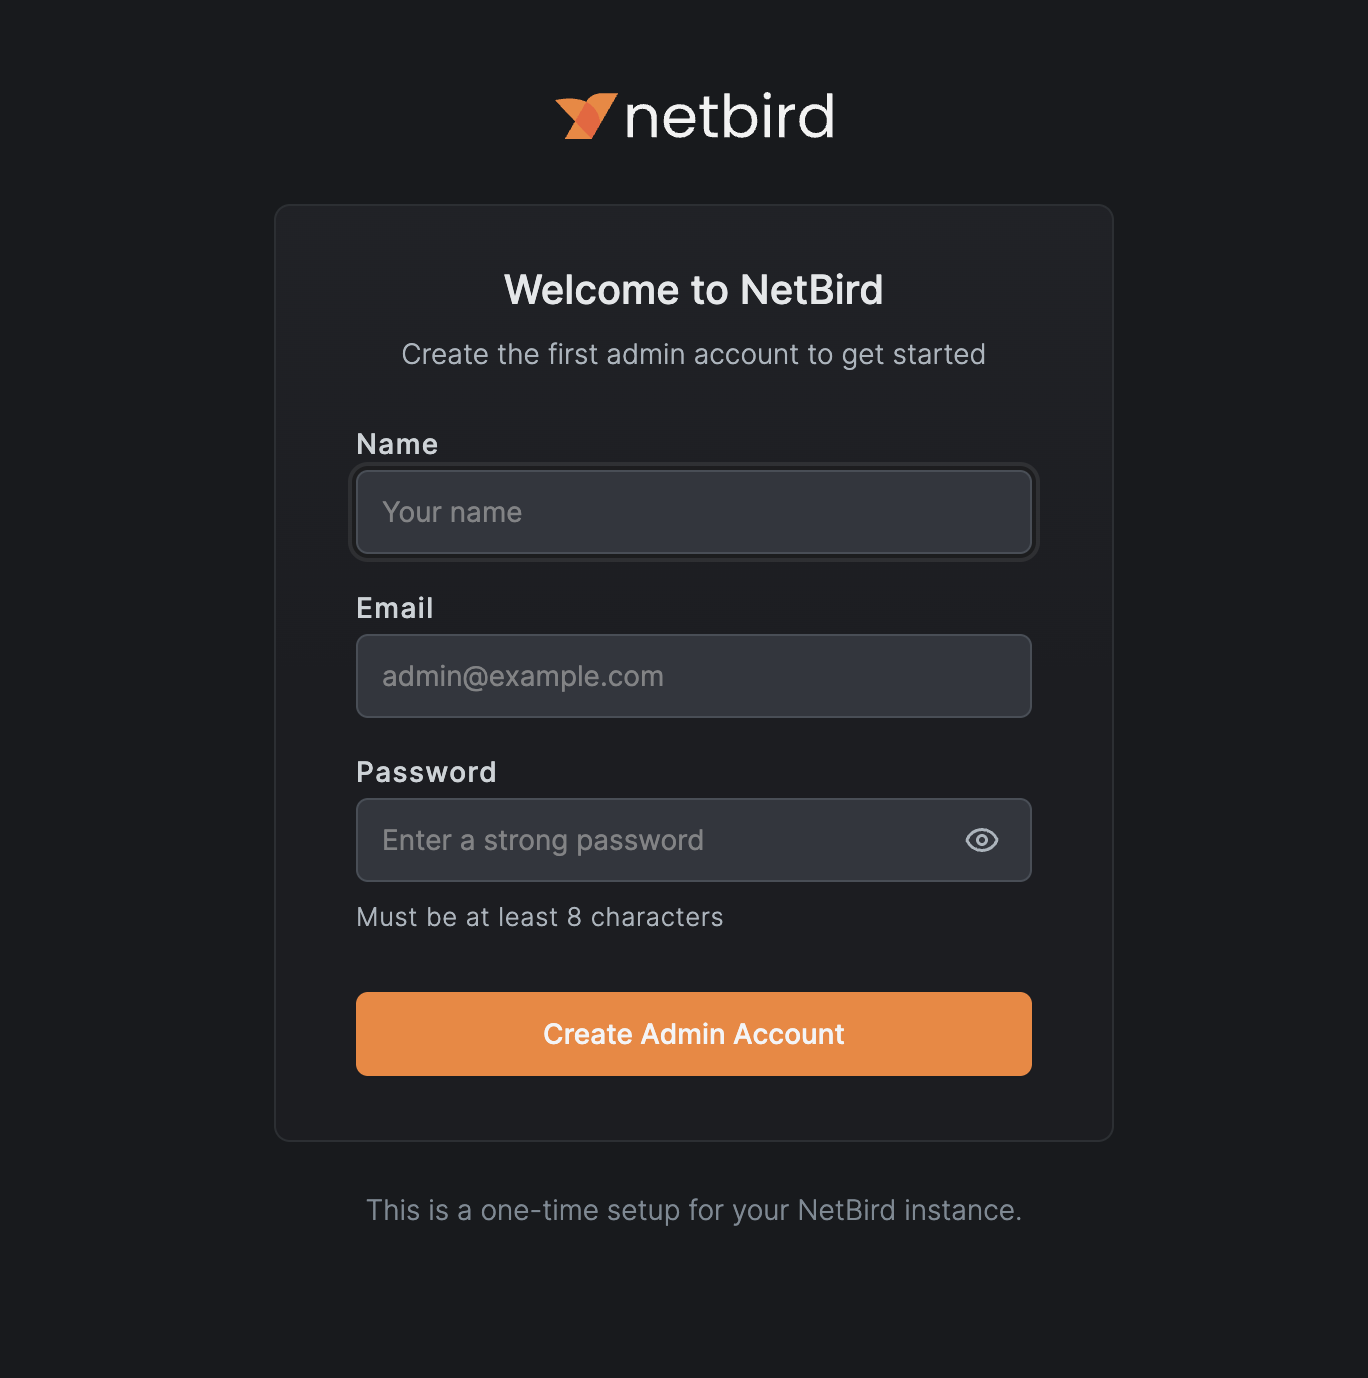
8. Then create an account and login with your admin credentials
9. Awesome you have just setup Netbird behind an existing Caddy reverse proxy.
No comments to display
No comments to display